create_a_character_2_1_1
We create a new Avastar default character, export it to Secondlife, and inspect its properties in the Secvondlife viewer.
Character Creation Part 2: Appearance Sliders
Introducing the Appearance Slider Panel
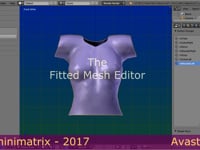
Character Creation Part 3: The Fitted mesh editor
Using the Fitted Mesh weight editor to improve appearance
About this Document...
Content:
-
Basics of Attachments
-
Skinning fundamentals
-
Weight Maps
-
Weight Inspection tools
The Cheat Sheet
-
Bind the Mesh
-
Inspect the Mesh
-
Create Test Pose(s)
-
Optimize the Weight Maps
-
Toolshelf: Export your character
-
SL: Import the model.
Some useful Hints
-
Is Avastar installed.
-
Check Blender’s Help section.
-
Find online doc: RMB -> Online Manual.
- In SL: Create a fresh Shape.
This Shape matches with Avastar’s default shape. - The gender setting is supported as well.
What does Avastar provide?
Avastar basically supports the creation of animatable Models (Avatars&attachments) and the creation of animations. Therefore the tool adds various functions and user interface elements to Blender.
The full functionality of Avastar can be a bit overwhelming when first viewed. You should be prepared to spend some time and have patience to get it all working nicely for your projects.
What does this Document provide?
This article is about creating rigged mesh attachments for SL Avatars (or OpenSim and similar). We concentrate mostly on the Avastar Tools, but most of the information in this document also applies for Second Life mesh creations in general.
This Document is very complex because the topic is complex as well. You should be prepared to spend some time experimenting and getting experience. Your best approach is to follow this article from top to bottom.
We recommend that users have basic knowledge of Blender before starting this document series.
This topic is not difficult,
it is only hard to explain.
Warming up
Please be prepared that there is a lot of experience and training involved when you work on skeletal animation (making rigged mesh for Second Life). You can compare this with learning to play the Piano. In both cases you need a bit of talent, the right tools, and a lot of experience and time for practicing.
Now let the games begin…
Noobie? Open this first...
If you are very new to Blender, or do not understand the terms, then this video gives you a brief introduction to the concepts of Blender’s user interface.
Patience you must have…
It also helps a lot when you get comfortable with Blender before you start this tutorial. In any case:
time you need
and patience you must have
my young Padawan!
Further reading
This article is mostly about rigged mesh attachments. And i try to give you as much background knowledge as possible, so that you can start creating your own attachments with confidence.
However, i expect that you have worked through the Create a Character tutorial
If you need to Create a Character, read this:
Attachments in a Nutshell...
Attachments are just regular objects, either Prims, Sculpties or Meshes which have been “attached” to an avatar. Furthermore, meshes can be either static (similar to Prims and Sculpties) or rigged (can be animated similar to the default SL Avatar)
Second Life supports two types of rigged objects, namely Rigged Mesh and Fitted mesh. Note that technically there is no difference between a rigged mesh and a fitted mesh (see below).
Rigged Mesh attachments
Rigged Mesh attachments are like any other attachments, but they additionally contain extra data which makes them fully controlled (animated) by the Avatar skeleton.
Fitted Mesh attachments
Fitted Mesh Attachments are a special form of rigged mesh attachments which additionally use a specific subset of the Avatar’s skeleton (the Collision Volume Bones)
Some Gotchas you must know...
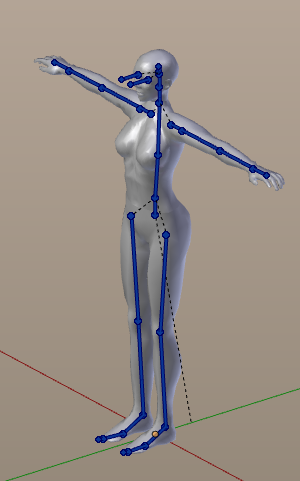
Attachment Points
Attachment points are hooks where you can tie objects to your avatar. In Second Life we have 32 attachment points where other objects can be attached. These attachment points are distributed all over the avatar (marked as red spots in the image). And each attachment point is “glued” to one of the 26 bones of the SL skeleton. Technically attachment points are regular Bones (for more about Bones see further down).
History
Before Mesh objects have become available, we had only static attachments: either rigid Prim objects or flexi Prim objects. These attachments only move along strictly in parallel to the movement of their attachment point. Thus something attached to a hand attachment point will move with the hand, something attached to a head attachment point will move with the head, etc.

SL Avatar with its Attachment points (displayed as red dots)
Note: Since Attachment Points are Bones, they can theoretically be used for weighting as well. But Second Life does not officially support this. We strongly recommend to not use attachment points for weighting purposes.
Mesh-up
Since summer 2012 SL also supports regular Mesh Objects. Since then we have got another possibility for beautifying our beloved Avatar, the Mesh Attachment
Static Mesh Attachments
Meshes are by default rigid Objects which behave exactly in the same way as regular Prims and Sculpted Prims. A Mesh object can be attached to a single attachment point exactly like Prims or Sculpties. So by default they move along with the Avatar like Prims do.
However, besides static Mesh Objects we can also create Rigged Meshes…
Rigged mesh and Skeleton
Meshes can be animated in exactly the same way as the SL Avatar itself is animated, by using a Skeletal Animation technique. In the context of SL this technique is named Rigged Mesh. So Rigged Meshes follow the movement of the Avatar in a more natural way. Like a dress can bend when the Avatar sits down, or a jacket follows exactly the arm movements.
Brief Details
Technically, Rigged Meshes are mesh objects with 2 additional features:
-
They are bound (attached) to a specified rig (or more precise: The SL Rig).
-
They have a well defined set of Weight Maps (in Blender: a set of vertex groups) corresponding to the Skeleton bones of the SL Rig.
Note: Weight Maps are described further down in this document.
Rigging & Skinning
There is a bit of confusion about these terms. So here is a bit of clarification for them:
Rigging
In very general terms a Rig is the animation system that is used later for animating the meshes. Rigging is the construction of such an animation system. In the context of SL the Rig is equivalent to what we know as the Avatar Skeleton.
The SL Default Rig
When we create attachments for the SL Avatar, then we actually have to use the SL Rig without changes. When we later upload a mesh to SL then -by default- the SL Importer assumes that the correct Rig was used, thus it does not even upload any skeleton information, even if it was modified in Blender (see below)!
Note: When you work on non-human characters, then the human skeleton is in general not suitable. Because of this it is possible to modify the Rig and upload the modifications to SL as well (this is what the with joints option does actually). But we will not get into this here. We have set up an entire course for Non-human Character rigging instead, which you can purchase separately on our Blog.
Skinning
Skinning is the process of connecting a Mesh (think of it as the Skin of your mesh) to a Rig (the Skeletal Bones that will animate your mesh), that is, we define exactly how each part of the mesh is influenced by the Skeleton. Skinning involves the creation of Weight Maps. And this tutorial is all about how to create and improve the Weight Maps for mesh attachments. So you are now in the middle of a skinning tutorial actually.
What we get from Avastar
In general skinning a 3D model is a complex and time consuming task.Blender already gives you most of the basic functions for achieving your results. However, there are still a few features missing or not easy to use with pure Blender. And there is where Avastar chimes in…
Basic Skeleton
The Second Life Basic Skeleton defines 84 bones for very different usages. Though you might only know about the 26 SL Defrom bones (mBones).
Avastar’s Basic Skeleton provides the complete set of bones that are also defined by SL. Plus a couple of extra bones mainly for animation purposes.
(1): The cBones are used for collision detection and for Fitted Mesh Attachments
Bones in the Basic SL Avatar:
-
26 Deform Bones (mBones).
-
26 Collision Volumes (fitted mesh).
- 32 Attachment points (hooks).
Bones in the Basic Avastar:
-
26 Deform Bones (mBones).
-
26 Collision Volumes (cBones) (1).
-
32 Attachment Bones (hooks).
-
29 Animation Bones.
-
14 IK Bones.
-
9 Extra- and Structure Bones.
Extended Skeleton (Bento)
The SL Avatar has been extended with a large set of extra bones for face, hands, wings, tail and hind limbs. You find a detailed description in the SL Skeleton page
Read more about The SL Skeleton
Avastar Tools…
Avastar also offers various tools which let you setup your attachments with little effort compared to the “pure” Blender Only solution. We will see a few of these tools in action shortly.
-
Copy weights.
-
Clean weights.
-
Find unweighted.
-
…
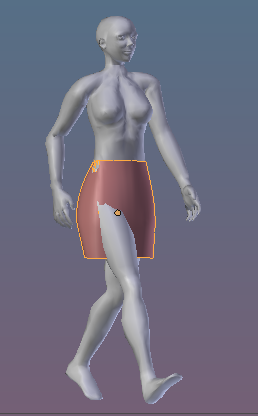
The working Model
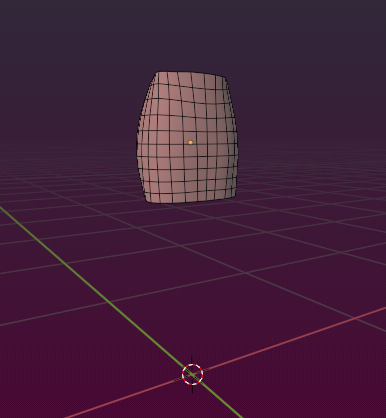
I will use a very simple skirt for this tutorial. This skirt comes as a simple static mesh model
Download from here:
simple_skirt.blend (if you want a blend file)
simple_skirt.obj (if you prefer an obj file, import with -Y front, Z up)
final_result.blend (Result of this document series)
Depending on your browser, you will probably need to right-click on the blend or obj link and “Save as” to download to your computer.
![]()
The above demo_model provided by Machinimatrix is licensed under a Creative Commons Attribution 4.0 International License.
For Second Life Users: We explicitly grant the permission to upload derived material to SL.
The goal
So our goal is to attach the skirt to the character such that it moves along with the model, but also bends appropriately when the legs move. This is what we typically call “skinning”. In simple words skinning prepares the static model for getting animated.
We have prepared a couple of documents about all aspects of modelling for Second Life. You also find the documents in the document tree on the right side of this page
Section Pages
Binding Meshes
Binding the Mesh. What you have done so far
Read more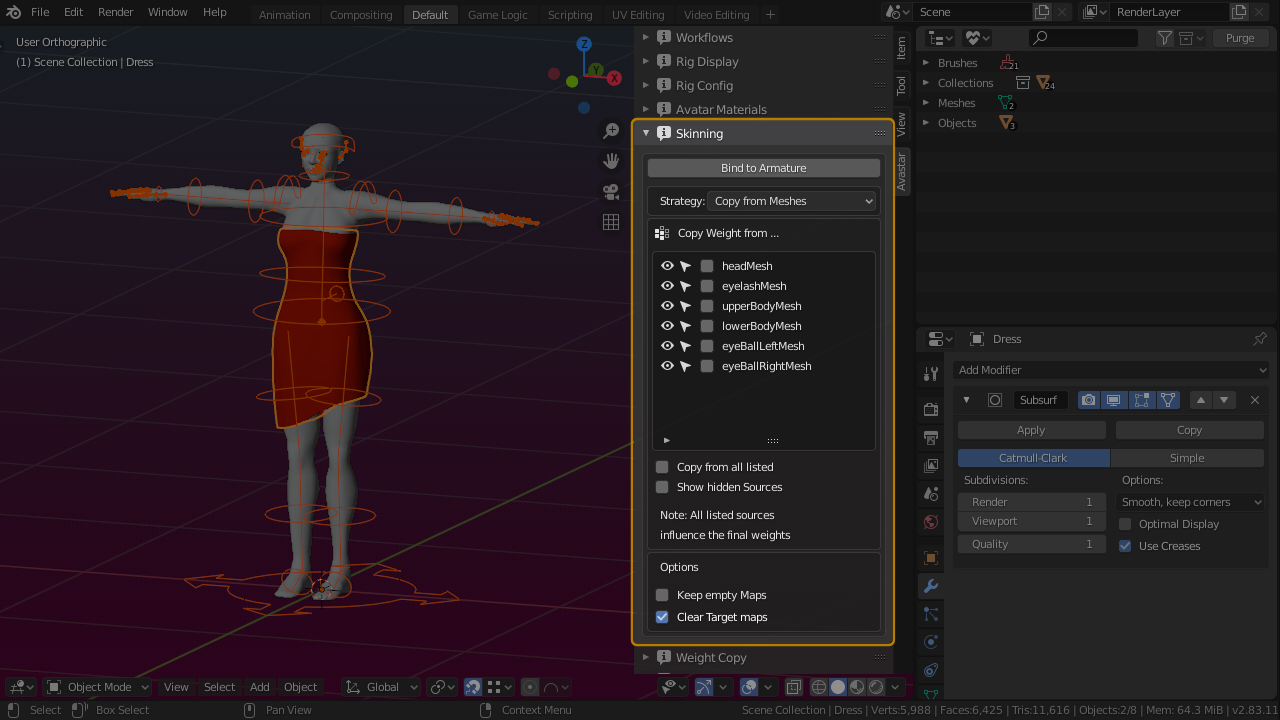
About Bones
The most important thing to know!
Read more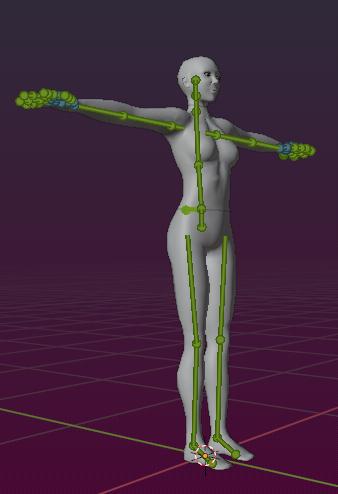
Inspect weights
We assume you have already bound your Mesh to the Armature and you have generated the Weights for your mesh by using Weight from Bones as described in the previous chapter (you used Bones as the weight source). Blender does a…
Read more
Edit Weights
In the following we try to improve the skirt’s animation. And while fixing the various parts of the mesh, we will introduce a couple of helpful tools for the task.
Read more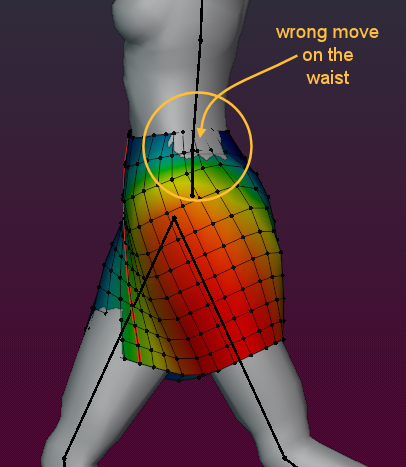
Bone Inheritance
Skeletal animation relies on inheritance: A weight on a bone at the end of a bone chain affects all movements induced by any of the bones in the chain. I can explain this best with an example:
Read more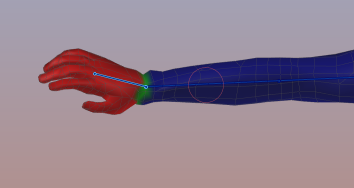
Topology
Stretching a mesh beyond reasonable proportions is mostly an indication for too few edge loops. Indeed we have too few faces in our mesh near the symmetry line. Thus our mesh topology does not work well with the way how we want…
Read more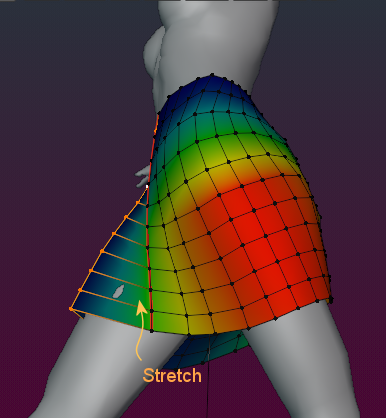
Export to Collada
The Collada exporter exports your Mesh character or mesh attachment to a file with the file ending .dae and possibly it also exports a set of images (image textures). You find the Mesh Exporter in the Blender Export menu.
Read more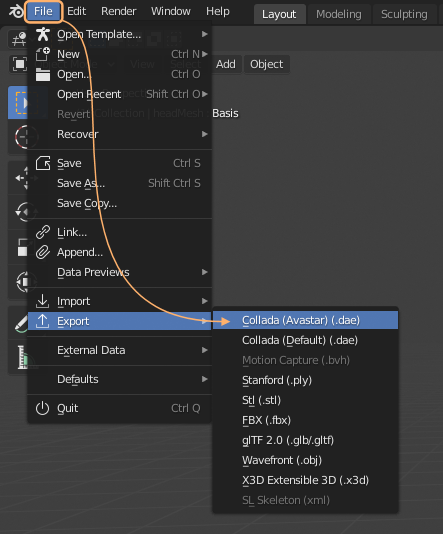
Final Remarks
Lets recap a bit. Until now we have taken the Skeleton structure as granted (well, this is dictated by the capabilities of the SL virtual world). We also have not yet given much attention to the animations, except from quickly…
Read moreSkinning Basics
This chapter is a very brief but hopefully complete introduction to the fundamentals of skinning and how this applies to Blender. If you are an experienced Blender user, then you may skip the first part of this document and…
Read more