Simply Avastar
This page contains basic usage sequences with Avastar 3.0 You can work through these sequences to become familiar with Avastar.
Tips
Tip: When you are still learning...
We recommend that you always begin with creating a fresh new scene with File -> New. That way, if something goes wrong, you can restart blender and run through the routine as a test this time:
Tip: When something unexpected happens...
Restart the routine and note your steps. If you, indeed, get the same unexpected results, you may have found a bug. Please be so kind and report this to us in our discord help channel for Avastar issues. The Invite link to our Server is:Avastar Issues (Discord)
From there please switch to the channel that matches best to your situation.
Dictionary
LMB,RMB
Left Mouse Button, Right Mouse Button
N-Panel
Sidebar on the right side of the 3D Viewport. You can open/close the N-panel by moving the mouse over the 3D Viewport, then press ‘n’ on the keyboard.
SHIFT-Select
Press the SHIFT key while selecting parts (with the left mouse button)
Create a Complete Avatar
-
Add -> Avastar -> Complete
-
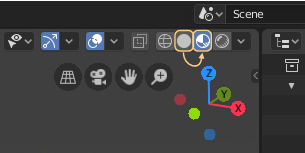
Switch
from Display in Solid Mode
to Display in Look Dev Mode:
-
Open N-Panel
-
Open Avastar Section
-
Open Avatar Materials panel
-
Select Female
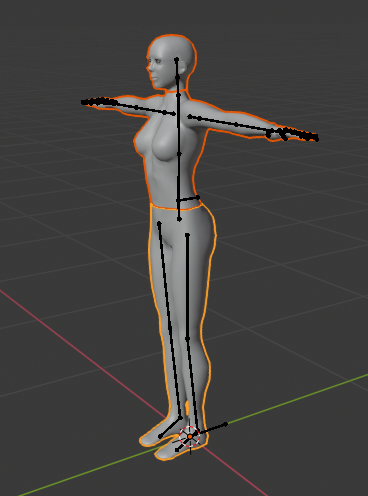
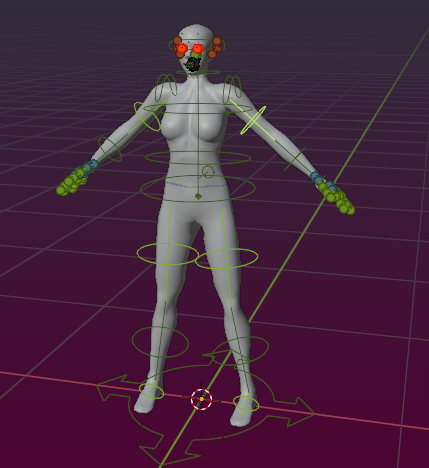
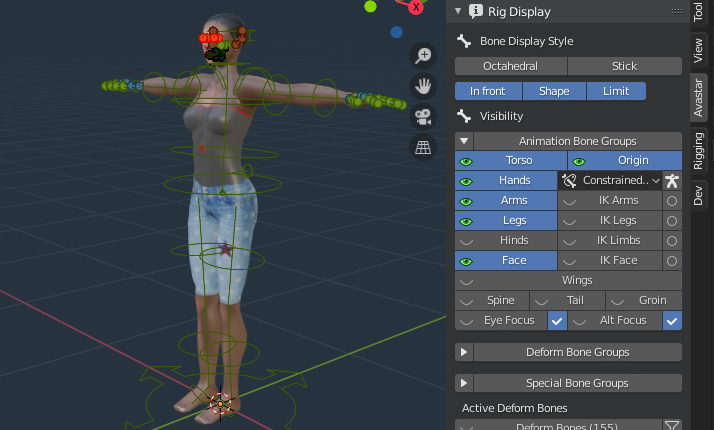 Notes about the image:
– The 3D ViewPort should now look similar to the image.
– The Rig Display Panel shows the available bone sections.
Pose the complete Avatar
-
Add -> Avastar -> Complete
-
Open N Panel
-
Open Avastar -> Rig Display Panel
-
Disable Limit
-
Disable Face bone Display
-
Grab green bones and move Avastar into a Pose
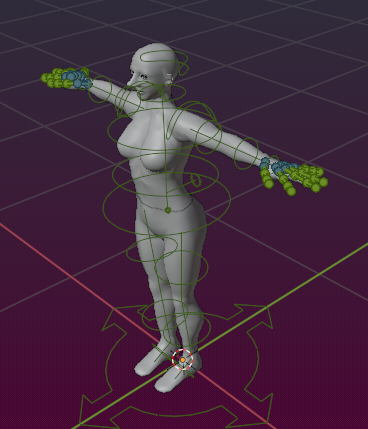
… and change Hand pose
-
Open N Panel
-
Open Rig Display Panel
-
Disable Shape
-
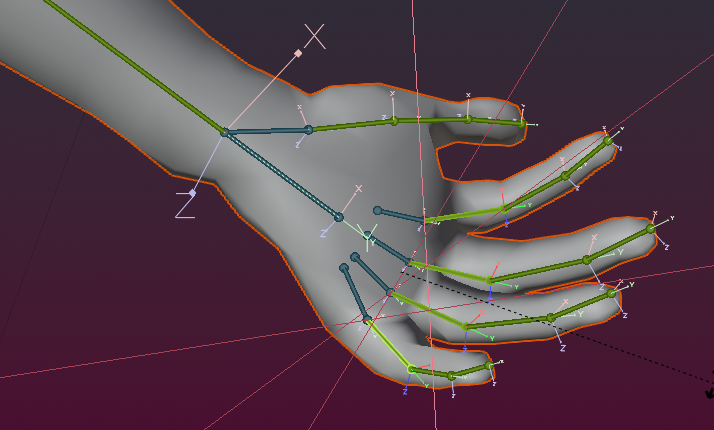
Select the first green finger1 bones of the 4 fingers of a hand
-
Additionally select the first green thumb bone
-
On the keyboard: R x x and then move the 3D cursor to open/close the hand
- Press LMB(i) to finish the hand pose
Slider test
-
Add -> Avastar -> Complete
-
Open N Panel
-
Open Rig Display Panel
-
Disable Face
-
Open Avastar -> Shape Panel
-
Change Body -> Height:
Note: While you move the height slider the character becomes smaller/bigger and the Feet keep staying on ground! -
Change Nose -> Size
-
Change Nose -> Width
-
Change Torso -> Arm Length
-
Change Head -> Size:
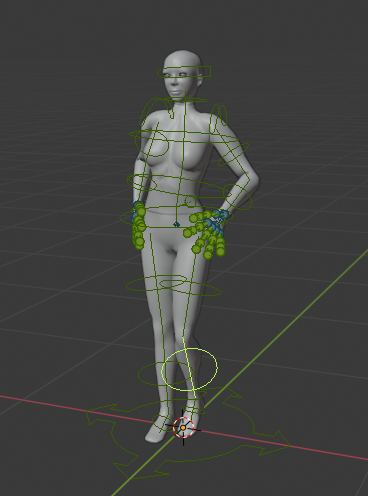
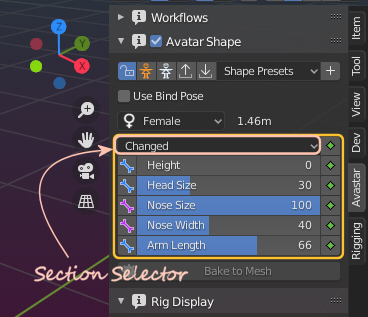
Note: The head size slider also changes the overall size of the other face components (nose, eyes, ears, etc) - Change Hand -> Size
- Select the Section Changedto see something similar as displayed in the image aside:
Export a simple SL Clone
-
Add -> Avastar -> Complete
-
Optional:
- Open N Panel
- Open Avastar Tab
- Open Rig Display Panel
- Disable Face
- Disable Shape
-
Edit -> Lock Object Modes (disable)
-
Select (and SHIFT Select)
- the HeadMesh
- the UpperBodyMesh
- the LowerBodyMesh
- File -> Export -> Collada (Avastar)(.dae)
Create a single Mesh SL Clone
-
Create a Bento Avatar (you can omit the posing, see above)
-
Open Object Properties
-
Open Avastar Materials panel
-
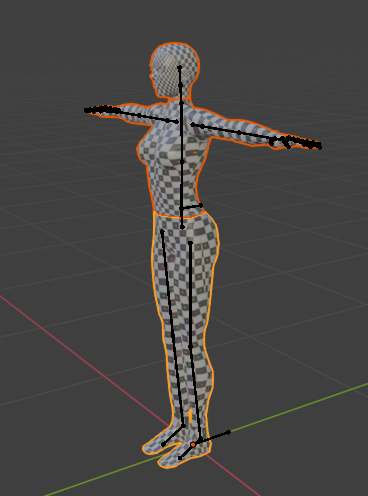
Select Custom (materials with grid texture)
-
Optional (verify materials):
-
Switch …
from Display in Solid mode
to Display in Dev Lock mode -
Select (and SHIFT Select)
-
the HeadMesh
- the UpperBodyMesh
- the LowerBodyMesh
-
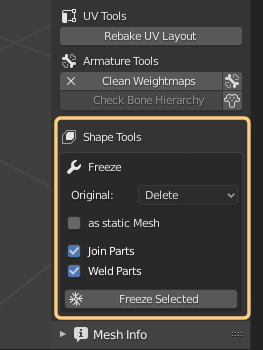
Open the Avastar tool Box
-
Search the Shape tools Section
-
Set
-
Original: Delete
- Enable Join Parts
- Enable Weld Parts
- Freeze Selected
Create an A-posed Avatar
Create a single Mesh SL Clone as described above. The material setting is not important here.
Make sure your Rig is in Pose Mode.
-
Select ShoulderLeft (green)
-
R 40 (rotate 40 degree clockwise)
-
Select HipLeft
-
R -10 (rotate 10 degree anti clockwise)
-
Select AnkleLeft
-
R 10
-
Select ShoulderRight (green)
-
R -40 (rotate 40 degree anti clockwise)
-
Select HipRight
-
R 10 (rotate 10 degree clockwise)
-
Select AnkleRight
-
R -10
-
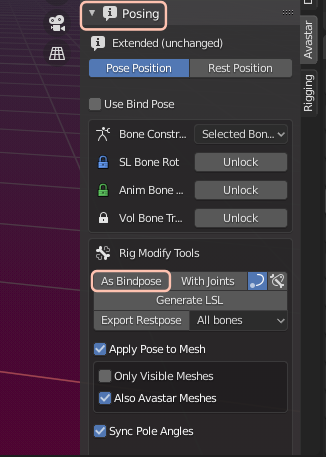
Open the Avastar Posing TAB
-
Scroll down to Rig Modify Tools
- Click As Bind Pose
-
Open the Shape Editor Panel
-
Select The Torso Section
- Move the Arm length slider
You should see the arm length changes as expected
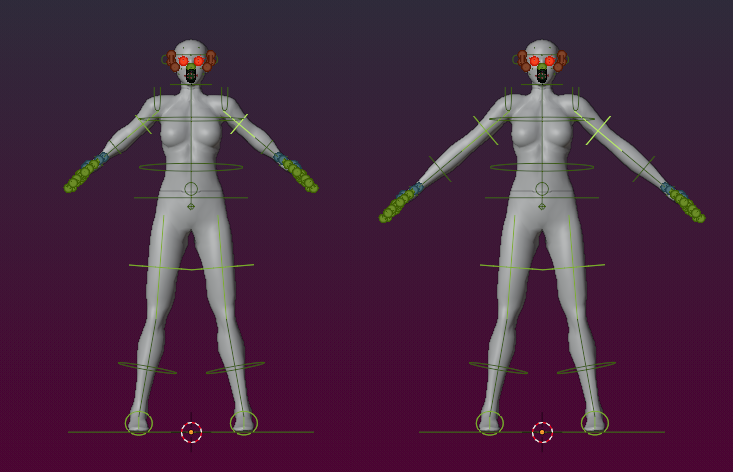
left: Arm length=0 Right: Arm length=100